
Guide On Upgrading Headlights
Why hellooo there! :)
This guide will help explain the difference between certain angel eyes, how to wire up angel eyes that require some wiring and how to fit your original levelling motor or adjust the beam manually.
Before we go any further - If you have xenon headlights as standard NO upgrade headlights will fit :( The loom is designed to only be compatible with halogen models. Sorry guys!
You might see angel eyes with yellow halo rings – Those are literally plug and play headlights, just like a standard headlight. No wiring is necessary and we personally would say that you could be capable of fitting them yourself if you have a bit of knowledge on how to remove a headlight. Youtube is your friend! :) Some cars will require the bumper to come off in order to fit the headlights so be prepared!
Also, In most cases they are “DEPO” branded angel eyes which are transferable between left hand drive to right hand drive via a metal lever. You must flick this lever up to set to right hand drive :)
You can locate this lever next to where you install your main beam headlight bulb, however it’s sometimes located elsewhere on different angel eyes. All you do is flick the lever up and voila!
Please see below a picture of what the lever looks like :)
Almost all DEPO branded angel eyes (with yellow bulb lit halo rings) do not come with main and dipped beam bulbs but will come with the halo bulbs. You can use your original bulbs as well as the levelling motor. In nearly all cases the halo ring bulbs are T5 286 fitment bulbs, which you can change if you fancied a different look! We sell the LED upgrade bulbs if you wanted an LED white look, please visit eBay item number 332310247768.
Now we're on to LED/DRL White angel eyes! :)
Most angel eyes with white LED lit rings will have wires left over that need to be wired into your side-light wiring. The LED lights rely on the side-light wiring voltage; they do not work independently and you cannot wire them directly to the battery. Most lights that are LED normally come complete with headlight bulbs. The brands you’ll more than likely be buying are either Junyan and Sonar.
ALL LED White angel eye/DRL upgrade headlights are UK right hand drive only. You CANNOT change from left to right hand drive.
The colours of the wires that need wiring in will vary, but in most cases they will be two different colours (normally red and black or black and white), to separate the earth wire from the live wire.
Black Wires = Earth wires
Red/White Wires = Live Wires
What you need to do is bunch up all of the black wires together, and wire them in to the cars side-light (NOT indicator) EARTH wire. Unfortunately, we will not know what colour your cars side-light wire will be, so it will be a case of elimination to find out which one it will be.
You then follow the same process with the red or white wires, bunch them all together than locate your cars LIVE side-light wire.
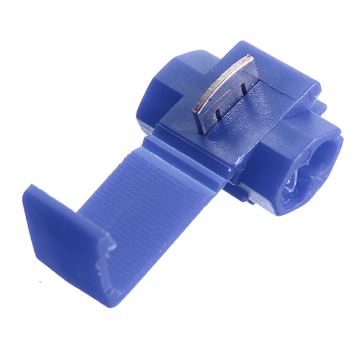
You will find a few ways to connect the two wires together with a quick Youtube search however what we recommend is using a scotch lock. It’s a small clamp where you put two different wires together and close down on a locking clamp. It properly connects the two wires together without any cutting of any of the wires yourself.
See below a picture of what they look like :)
If you are experienced with wiring, you can splice them directly together wire to wire.
Now it’s time to test the lights! Turn on your side-lights and see what happens :)
If your halos don’t illuminate or you experience flickering, don’t automatically assume that they’re faulty. Odds are there might not be a good connection and it just needs a better wired connection. Re-wire when necessary or clamp down on the scotch lock harder.
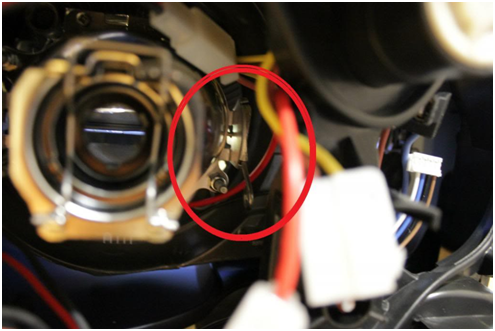
Some after-market angel eyes and day running lights will change from electric adjust to manual adjust, however in some cases you can take the manual adjuster out and fit your original levelling motor.
The adjuster to take out looks like a round cog with a screw running through the middle – You need to take it out (usually with the use of pliers) and fit your original motor in there. Your levelling motor wire will look like a small spade connector with a white plastic end.
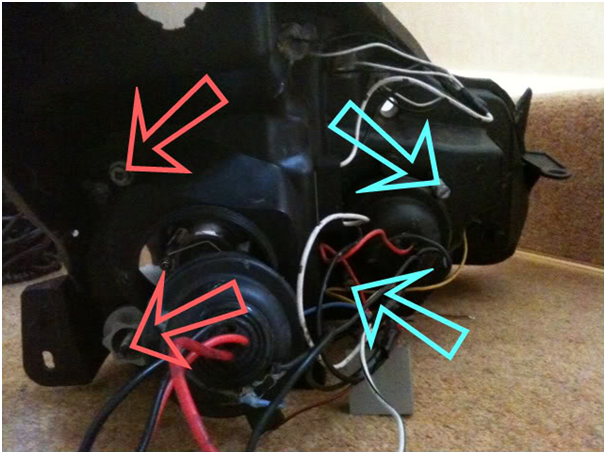
For manually adjusting headlights, on the back of your headlight unit you will see plastic inscriptions that will show an arrow of U + D and L & R. It stands for up down, left right. You need to turn them carefully to adjust your beam. They tend to look like a Philips screw or a long metal screw with a flat end (they do vary!). Twist them to get the desired beam pattern :)
Here’s a picture below of an example of what the adjusters look like :)
We would strongly recommend a garage levels the headlights for you, because they must meet MOT standards.
For some of you, you’re very lucky! Some (not all) after-market LED angel eyes are plug and play. Please check our listing descriptions to confirm whether it says they required some wiring or whether they’re plug and play :)
Hope this helps!